This is it. Countless hours of checking our budget, researching builders, stressing over color selections, driving back and forth to the construction site to check on progress, and the excitement of shopping for the house... all resumed into a seemingly never-ending pile of papers and 2 hours of signatures. We did it; we're homeowners.
We did encounter a couple of bumps on the road. Expecting otherwise would have been completely unrealistic. But we enjoyed the process and look forward to making wonderful memories in this home. Even though this may not be our forever home, it will definitely be a special place for us.
Now let the projects begin!
Showing posts with label project. Show all posts
Friday, June 2, 2017
Closing Day!
Labels:
closing,
documents,
homeowners,
NVR,
process,
project,
ryan homes,
strauss,
timeline,
townhouse
Sunday, March 19, 2017
Update!
Hello Y'all!
We heard from one of our SRs that the guys were working hard on our place on Saturday, so we stopped by today to see if there was any progress made since Wednesday (the day we visited to see how Tuesday's snow impacted construction). We got an email from the PM on Friday saying that the snow did delay them a little bit, but that the roof and HVAC will be installed next week. As of now, pre-drywall should be on the second week of April, but nothing has been scheduled yet.
We have exterior doors, windows, and I'm assuming they are done with framing. We snuck inside the house and took some pictures. Enjoy!
We got windows and a door :)
View from front door - stairs
View from front door - access to garage
Basement
Stairs from first to second floor
Morning room - pantry to the right. A nice deck will be outside those doors
Living room - <3 bay window
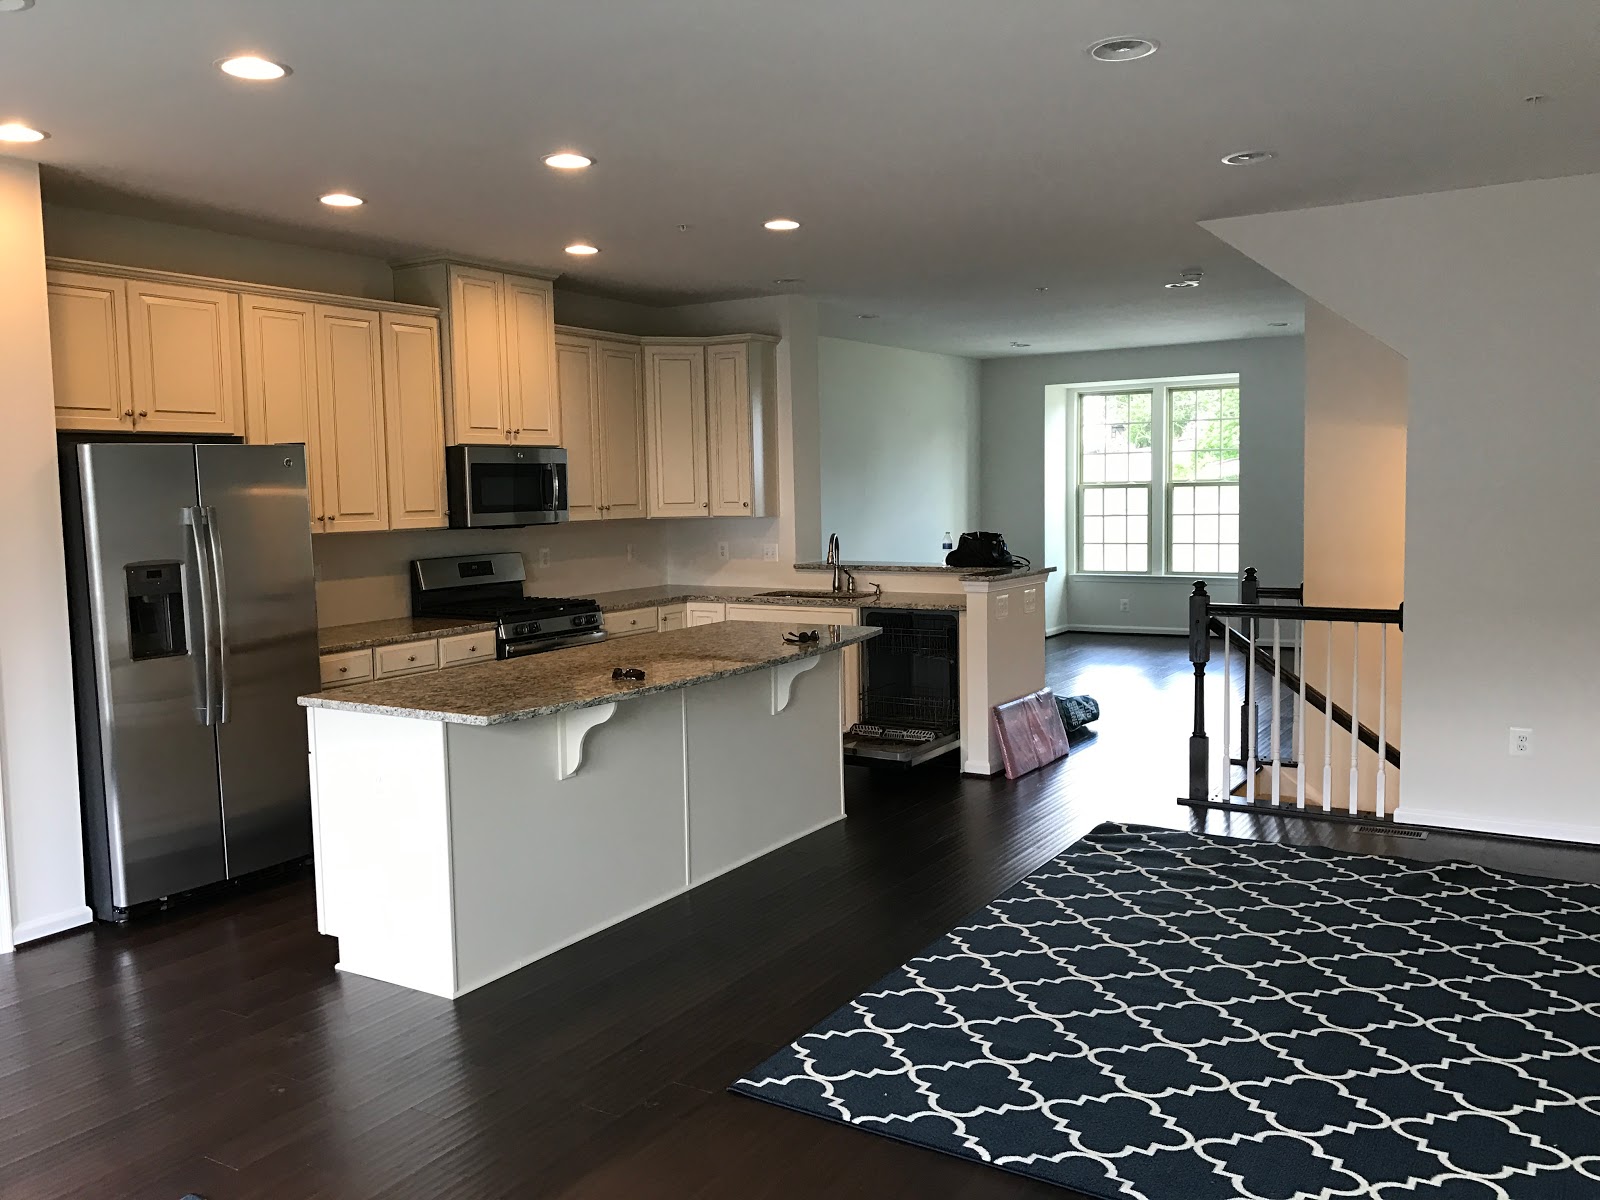
Second / main floor from morning room. Kitchen will be to the left, dining area to the right
Stairs from second to third level
Laundry room on the left; hall bathroom to the right
Master bedroom with master bathroom on the right
Back of the house
Labels:
construction,
door,
framing,
HVAC,
new home,
PM,
pre-drywall,
project,
roof,
ryan homes,
sales rep,
strauss,
townhouse,
visit,
windows
Sunday, March 12, 2017
A Roof Over Our Heads
Chad and I were a little concerned about the snow storm that is coming our way. We are expected to get about one-foot of snow on Tuesday here in MD. I know we are not first people to ever build a house in bad weather, but it makes us nervous. First-time buyers, ok? Give us a break :P
We sent a note to our SR this afternoon to ask if they guys had been working this weekend. Last time we stopped by was on Friday evening, and we saw they had added trusses to the house. She responded saying they were working really hard through some nasty wind to get the roof in place in anticipation for the snow. Woohoo. It makes us feel a liiiiittle better, even though we know there are cracks and holes all over the house still.
Can't wait until the house is all wrapped so they can start working inside :)
Labels:
construction,
exterior,
new home,
project,
roof,
ryan homes,
sales rep,
strauss,
townhouse,
visit,
weather
Sunday, February 19, 2017
Construction Update and Pictures - Week 6
Hi all :)
In addition to Sam's video on Wednesday, Frank (PM) updated us on what's been done and what's coming next. Here's where we are as of Friday 2/17:
We've completed the foundation and begun tying in the water and sewer and doing the groundwork plumbing. If weather cooperates next week I'm hoping to have the slab poured so we can start framing a week from Monday.
Oh yea, Frank. Weather will be just fine :D
Chad and I stopped by on Saturday and took some pictures. Funny how during the foundation step of the process, the house looks so tiny!
Panoramic of our row. There will be 5 houses. We have the second from the right to the left.
Our one-car garage at the front of the house. The front door will be to the left of the garage.
Picture of the back of the house. Our garage to the left. The neighbor's front door and ours will be side to side.
Another picture of the back of the house. It shows the foundation wall a little better.
Wednesday, February 1, 2017
Project 1: Make the Chairs Great Again! - Part 2
Putting the fabric on the chair was a little more challenging than I thought. As I mentioned in part 1, save your templates. It will make this project so much easier. We made a couple of mistakes here and there (I'll let you know what they are), but for the first time trying something like this, I think the first chair turned out pretty good. We will definitely apply our learnings when we are ready to work on the second one--but not yet; I need a couple of days off and a big glass of wine.
We started with the seat portion. Get enough fabric to cover the whole seat, with some to spare. Start by stapling both sides in one spot (right in the middle), just so it's easier to handle the fabric. Mistake 1: I had barely enough fabric towards the back to tuck between the seat and the back--leave more fabric than what the picture shows.
Around the leg posts, make a slit on the fabric and tuck one part between the seat and the back and wrap the other side around the legs. Cut the excess and staple the fabric behind the chair. Mistake 2: our slit was too towards the middle of the chair, not the ends. When was time to wrap the fabric around the legs, we almost didn't have enough fabric to cover the seat (see photo below). We were able to move things around and make it work, but it created some tension in the corner.
Continue to staple the sides from the back to the front. Mistake 3: make sure you are pulling the fabric towards the back of the chair and not straight down when stapling it. If you pull it straight down, you will have too much fabric to work on in the front of the chair and it will be difficult to create a clean front corner.
For the front corner, we were so stressed to get it right that I forgot to get a picture. After you staple both sides from back to front, you will end up with some folded fabric on the corners. Fold it towards the back of the chair very tightly and staple that side. Cut any excess fabric, pull the remaining fabric (also tightly) over the fold you just created and staple the bottom part. I only have a finished photo in which I placed a tack to hide the staple, but it will give you an idea.
Can't say it was the most fun project I've ever worked or the one with the best results, but I like it! Like I said, it is definitely better than it was and we will make improvements to the second chair. Final results:
For the front corner, we were so stressed to get it right that I forgot to get a picture. After you staple both sides from back to front, you will end up with some folded fabric on the corners. Fold it towards the back of the chair very tightly and staple that side. Cut any excess fabric, pull the remaining fabric (also tightly) over the fold you just created and staple the bottom part. I only have a finished photo in which I placed a tack to hide the staple, but it will give you an idea.
Moving on to the back. Just like the seat piece, we covered the front with enough fabric to fold on top, sides, and between seat and back. Also cut a slit so fabric can be tuck between seat and back and wrap around leg posts. Make sure it clean and neat around post as this is the part of the chair that will be visible. We started stapling the top, then the sides, from bottom to top. On the corners, use the same method used for the seat corners.
Finally, we covered the back. We were wondering how we were going to do that in a way that it didn't look crappy and we weren't satisfied each time we just played with the fabric before stapling it, but at the end we don't think it was bad. We used a few staples to hold it in place. We knew we were going to cover it with tacks afterwards. Also, we added the dust cover to the bottom of the chair.
Can't say it was the most fun project I've ever worked or the one with the best results, but I like it! Like I said, it is definitely better than it was and we will make improvements to the second chair. Final results:
Monday, January 30, 2017
Project 1: Make the Chairs Great Again! - Part 1
Hi everyone! :)
I won't have many updates on the house for about another week, so I decided to share one of the projects we've been working on. Chad and I will give our old Parson chairs a new purpose in life: decorating our new living room! Our sofa is charcoal and we want to have blue accents in that space, so this original burgundy color has to go. Also, what's up with the fabric-covered legs? Nope.
The first thing we did was carefully cut the fabric around the legs and back using an x-acto knife in order to expose the staples used to hold the fabric together. And holy crap, staples WERE plenty on this darn chair. We used a heavy duty staple remover we bought at Joann Fabrics for $10--you can probably use pliers to do the job, but it will require a lot of time and patience. The investment was well worth it. We were cautious not to remove staples holding the seat and back cushions. One thing we didn't think of until later in the process was to keep the fabric as intact as possible. It will help you tremendously when it's time to cut the new fabric as you can use it as a template.
Once the chair was completely naked (hehe), we fixed the legs. They were unfinished underneath the fabric and all the staples left it with more holes than Swiss cheese. We used wood putty ($5 at Home Depot) to fill the holes and fix any imperfections in the legs. We let it dry for about 4 hours and used 180 grit sandpaper to smooth it all out.
After the legs looked smoother than a baby's butt, I used two coats of Rust-Oleum Gray Spray Primer to prep the legs for paint. Make sure to really clean all the sand dust with a damp cloth and let it dry it completely before applying the primer. It was cold, dark, and windy, but I toughen up and made it work.
After letting it dry for a couple of hours, it was time to paint. We choose Black Rust-Oleum Gloss Paint for the job. Here are some pictures after 2 coats; I actually put another one later in the day, just didn't capture a photo.
Excuse the bathroom photo--this is the bad thing about living in an apartment :P
The next step is to apply the new fabric. I will create a different post for this part. See you then!
Subscribe to:
Posts (Atom)


