Sunday, March 12, 2017

A Roof Over Our Heads

Chad and I were a little concerned about the snow storm that is coming our way. We are expected to get about one-foot of snow on Tuesday here in MD. I know we are not first people to ever build a house in bad weather, but it makes us nervous. First-time buyers, ok? Give us a break :P 

We sent a note to our SR this afternoon to ask if they guys had been working this weekend. Last time we stopped by was on Friday evening, and we saw they had added trusses to the house. She responded saying they were working really hard through some nasty wind to get the roof in place in anticipation for the snow. Woohoo. It makes us feel a liiiiittle better, even though we know there are cracks and holes all over the house still. 


Can't wait until the house is all wrapped so they can start working inside :)


Tuesday, March 7, 2017

Got Wood?

Hubby and I stopped by the house this afternoon to get some idea on how our backyard grading is going to look (more on this on a different post) and we were pleasantly surprised. A lot of progress done in 2 days :D

It's been raining in MD so it makes me a little nervous that the lumber is getting wet. But I guess it's pretty normal--just first time home buyer anxiety.

Here are the pictures!

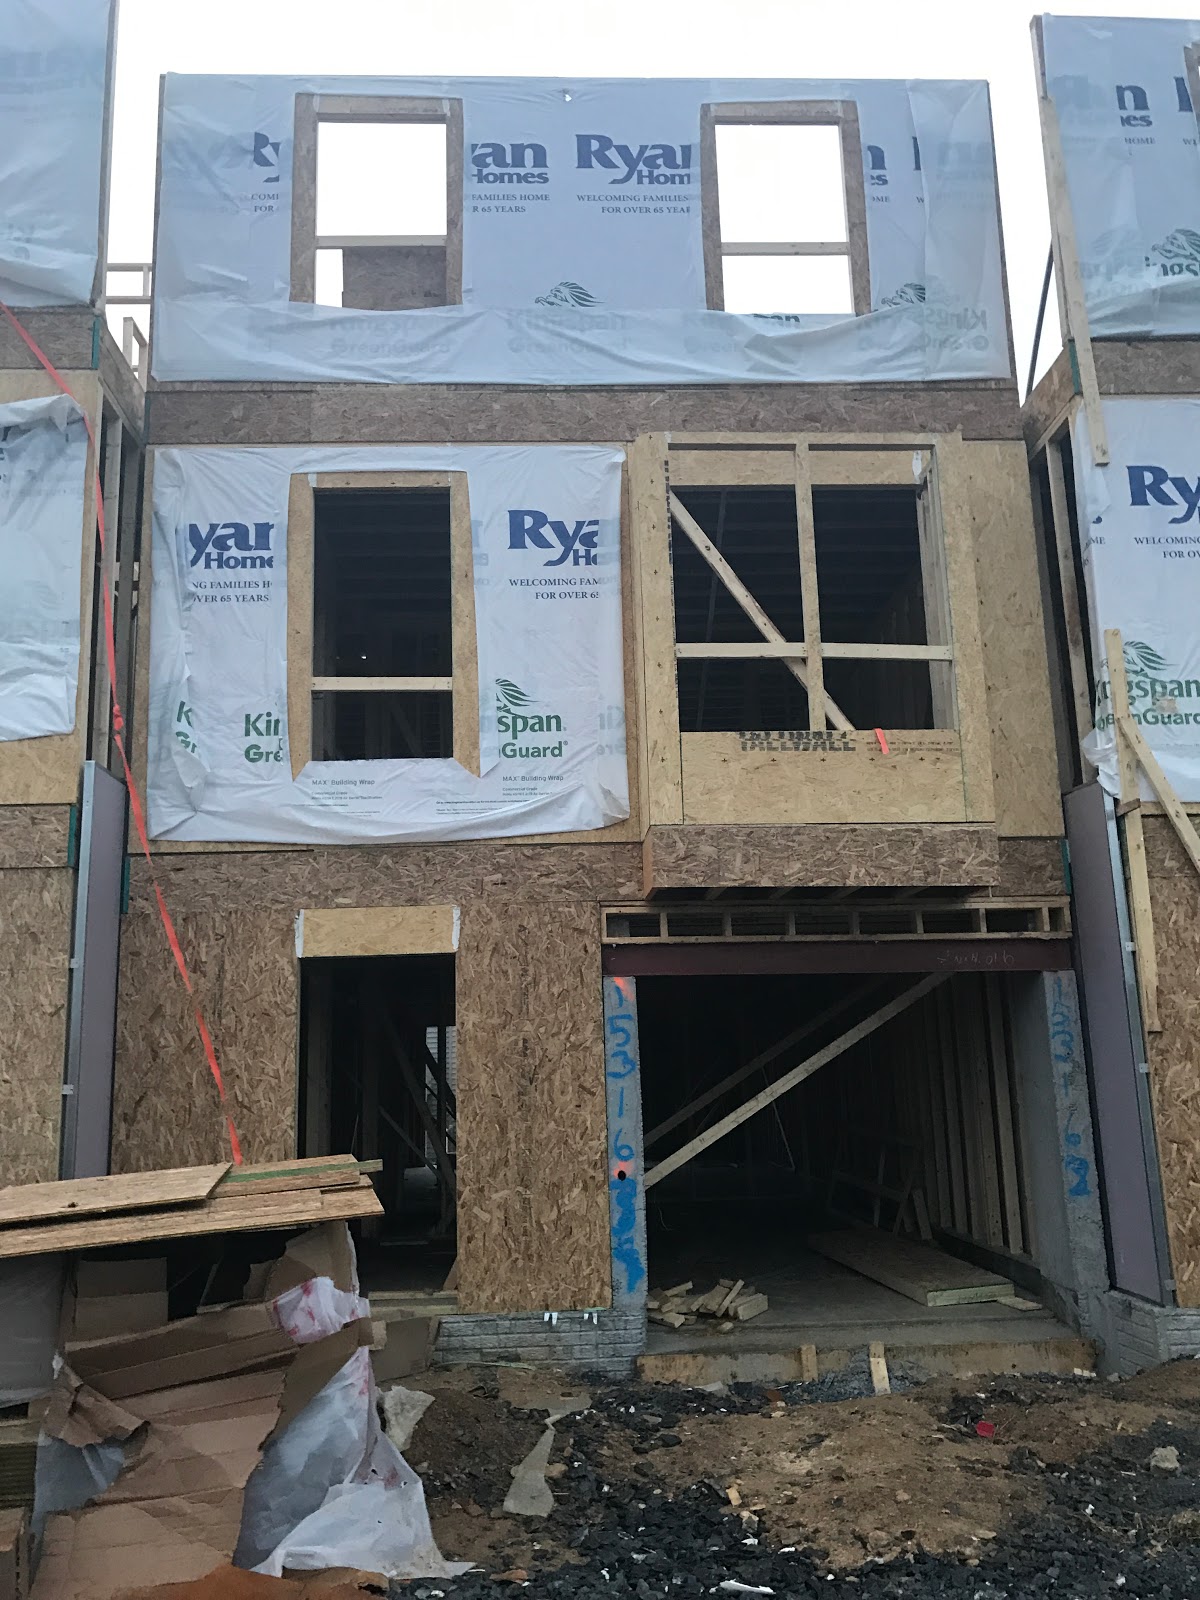
Front of the house

Front closet seen from the front door

Powder room by front door seen from front door

Future driveway seen from garage

Back of the house seen from back of property line

Garage

Hallway from front door to basement (stairs will be on the right) seen from basement walkout


Saturday, March 4, 2017

Construction Update - Week 8 - Framing (pictures)

Hello!

Chad and I stopped by to see in person the progress that Sam sent us in the video. According to the PM, the first floor is finished and the fire wall (the purple board you see) has been installed. They will be working on the second and third floors in the next couple of weeks.

We're excited to see a pile of dirt and wood start looking like a house :)

The only thing we are a little concerned is with the slope in the backyard. Apparently, our backyard will be sloped due to water run-off. We asked the PM if it will be graded a little more so the slope is not as steep. I'll let you all know when the PM answers our questions. Enjoy the pics!

Front of the house. You can see the bump out above the garage

Apparently, we will have a very long front yard. I wonder how long the driveway will be

Row of houses. Our is the only one without the second level frame, grrr (haha)

Fire wall can be seen on the side of the house. This is the back of the house, the walkout basement

You can see the backyard slope

Wednesday, March 1, 2017

Construction Update - Week 8 - Framing

If you remember, during week 6 we received an update from our PM that in week 7 (last week) the slab was going to be poured and during week 8 (this week), framing would begin.
This past Saturday, I stopped by the community to talk to my SR and the slab wasn't done. I was a little upset, but since we're trying to settle a little later than the estimated completion anyway, I didn't stress about it. I figured framing was going to be pushed at least out a week or so.


Today, I got this video from my SR. Three days ago we didn't even have a slab and today we're pretty much done with the first level?! HOLY CRAP!


We'll stop by for pictures sometime this week.


YAY! :D

Sunday, February 19, 2017

Construction Update and Pictures - Week 6

Hi all :)

In addition to Sam's video on Wednesday, Frank (PM) updated us on what's been done and what's coming next. Here's where we are as of Friday 2/17:

We've completed the foundation and begun tying in the water and sewer and doing the groundwork plumbing. If weather cooperates next week I'm hoping to have the slab poured so we can start framing a week from Monday.

Oh yea, Frank. Weather will be just fine :D


Chad and I stopped by on Saturday and took some pictures. Funny how during the foundation step of the process, the house looks so tiny!


Panoramic of our row. There will be 5 houses. We have the second from the right to the left.

Our one-car garage at the front of the house. The front door will be to the left of the garage. 

Picture of the back of the house. Our garage to the left. The neighbor's front door and ours will be side to side.

Another picture of the back of the house. It shows the foundation wall a little better.


Wednesday, February 15, 2017

Construction Update - Footers

Hello!


Sam, our SR, just sent us a video showing the progress in our house. It looks like they are pouring footers for our home today! I plan on driving by the house this weekend and see how that's going. I'll get some pictures to upload here later.


Also, I added a link to a website with an explanation on what footers are and their purpose on my Helpful Links in the Menu to the right --->


Here is the link for the video Sam sent us.

Saturday, February 11, 2017

I See Dirt!

Chad gets so frustrated that cleaning and organizing is one of my hobbies. He says, "Woman, you just woke up. Let go of the vacuum and sit your butt down for a minute!" I come from a culture where mommy would wake up early and I'd get up to music playing, broom sweeping, and food cooking. So yes, I love seeing my house clean.

So, with that, I never thought I'd say I've never been happier to see some dirt! Look at that pile--most beautiful thing I've seen in months! It's real. It's happening :D


Tuesday, February 7, 2017

Pre-Construction Meeting

Pre-construction meeting is out of the way!

We met Frank, our Project Manager, today. He was very nice and attentive to our questions and concerns. He's been with Ryan Homes for 5 years managing different communities. He seems very knowledgeable and didn't skip a beat when it was time to answer my questions. We liked him, which is a great start :)
For everyone out there: make sure you know exactly which changes you've made, even if you got your Addendum. We had an extra outlet in the basement ceiling and the single kitchen bowl selected, but they weren't on the PM's paperwork. That is exactly the purpose of those meetings, of course, but don't assume RH will have everything in place.

Here are the answers to my questions:

1. When will you be onsite?
Monday - Friday, 6:30am to 3:30pm

2. Will you be away on vacation during this build?
No

3. What's your preferred contact method and how frequent will we get updates?
Email or text. At the beginning, probably every other week. As construction pick up, weekly

4. What is the rough schedule from ground breaking to delivery?
Breaking ground tomorrow. Should be finished by end of April / beginning of May (we had asked SR at contract signing to settle in June, if possible. She said she's aware and we should be ok with that)

5. Can remnants be saved from construction (tile/wood/carpet/siding/etc.) and placed in garage?
Yes. We will keep it in the unfinished portion of the basement. Note that if we have to do any fixes in the first couple months after you move in, that we will use that material first before ordering more.

6. Will the subflooring be glued/screwed or glued/nailed?
Glued / screwed

7. Will drywall be screwed or nailed?
Both

8. What kind of insulation do you use throughout home? Blown/sprayed/batting?
Blown in the attic, batting in the exterior walls

9. Is each bedroom on a separate circuit?
Master is on one circuit, 2nd and 3rd bedrooms should be on another

10. What type of feed lines are run for plumbing? PEX/PVC/copper?
PEX for water and PVC for drain

11. Does our ump pump come with backup battery?
No. We don't need it since we are on a slab

12. How many coats of asphalt will the driveway get? 
Potentially two

13. What's the location of power outlets (and make sure he knows of the basement ceiling one we paid for)?
We were shown an electrical map of the house

14. Will the laundry room have light and outlets?
Yes

15. Are there outlets in garage and exterior?
Outlets in the garage wall, as well as one in the ceiling. One outlet by the front door, one on the deck, and one under the deck

16. Where is the hose connection located?
One in the garage and another one in the back of the house

17. Will our lawn be seeded?
Sodded

18. What are the dimensions of the backyard for fencing? 
He gave us a plot map. Should be 26 x 20', approximately

19. When can we visit site?
Anytime, just give him a heads up so he can expect us

20. Which way does the ceiling beam in basement run?
Side to side


21. Can you center the island lights?
No (this one was a bummer. We have 6 recessed lights in the kitchen, but the 3 lights above the island is not centered)


Those were the main questions. Now we wait until we see progress. Can't wait to start getting pictures :)

Monday, February 6, 2017

Pre-Construction Meeting Prep Work

Hello, hello!


Finally, I have some updates regarding our home: we will have our pre-construction meeting tomorrow. Woohoo!
Chad and I aren't too sure what to ask the Project Manager, so I did some researching on Google. Also, I saw a post from Travis at Some Roads Lead to Rome which helped me tremendously. I'm sure more questions will come to mind once we're there, but this should be a great starting point. I'll update the post tomorrow with the PM's answers:


1. When will you be onsite?
2. Will you be away on vacation during this build?
3. What's your preferred contact method and how frequent will we get updates?
4. What is the rough schedule from ground breaking to delivery?
5. Can remnants be saved from construction (tile/wood/carpet/siding/etc.) and placed in garage?
6. Will the subflooring be glued/screwed or glued/nailed?
7. Will drywall be screwed or nailed?
8. What kind of insulation do you use throughout home? Blown/sprayed/batting?
9. Is each bedroom on a separate circuit?
10. What type of feed lines are run for plumbing? PEX/PVC/copper?
11. Does our ump pump come with backup battery?
12. How many coats of asphalt will the driveway get? 
13. What's the location of power outlets (and make sure he knows of the basement ceiling one we paid for)?
14. Will the laundry room have light and outlets?
15. Are there outlets in garage and exterior?
16. Where is the hose connection located?
17. Will our lawn be seeded?
18. What are the dimensions of the backyard for fencing? 
19. When can we visit site?
20. Which way does the ceiling beam in basement run?
21. Can you center the island lights?


Wednesday, February 1, 2017

Project 1: Make the Chairs Great Again! - Part 2

Putting the fabric on the chair was a little more challenging than I thought. As I mentioned in part 1, save your templates. It will make this project so much easier. We made a couple of mistakes here and there (I'll let you know what they are), but for the first time trying something like this, I think the first chair turned out pretty good. We will definitely apply our learnings when we are ready to work on the second one--but not yet; I need a couple of days off and a big glass of wine.

We started with the seat portion. Get enough fabric to cover the whole seat, with some to spare. Start by stapling both sides in one spot (right in the middle), just so it's easier to handle the fabric. Mistake 1: I had barely enough fabric towards the back to tuck between the seat and the back--leave more fabric than what the picture shows.


Around the leg posts, make a slit on the fabric and tuck one part between the seat and the back and wrap the other side around the legs. Cut the excess and staple the fabric behind the chair. Mistake 2: our slit was too towards the middle of the chair, not the ends. When was time to wrap the fabric around the legs, we almost didn't have enough fabric to cover the seat (see photo below). We were able to move things around and make it work, but it created some tension in the corner.


Continue to staple the sides from the back to the front. Mistake 3: make sure you are pulling the fabric towards the back of the chair and not straight down when stapling it. If you pull it straight down, you will have too much fabric to work on in the front of the chair and it will be difficult to create a clean front corner.

For the front corner, we were so stressed to get it right that I forgot to get a picture. After you staple both sides from back to front, you will end up with some folded fabric on the corners. Fold it towards the back of the chair very tightly and staple that side. Cut any excess fabric, pull the remaining fabric (also tightly) over the fold you just created and staple the bottom part. I only have a finished photo in which I placed a tack to hide the staple, but it will give you an idea.


Moving on to the back. Just like the seat piece, we covered the front with enough fabric to fold on top, sides, and between seat and back. Also cut a slit so fabric can be tuck between seat and back and wrap around leg posts. Make sure it clean and neat around post as this is the part of the chair that will be visible. We started stapling the top, then the sides, from bottom to top. On the corners, use the same method used for the seat corners.


Finally, we covered the back. We were wondering how we were going to do that in a way that it didn't look crappy and we weren't satisfied each time we just played with the fabric before stapling it, but at the end we don't think it was bad. We used a few staples to hold it in place. We knew we were going to cover it with tacks afterwards. Also, we added the dust cover to the bottom of the chair.


Can't say it was the most fun project I've ever worked or the one with the best results, but I like it! Like I said, it is definitely better than it was and we will make improvements to the second chair. Final results: